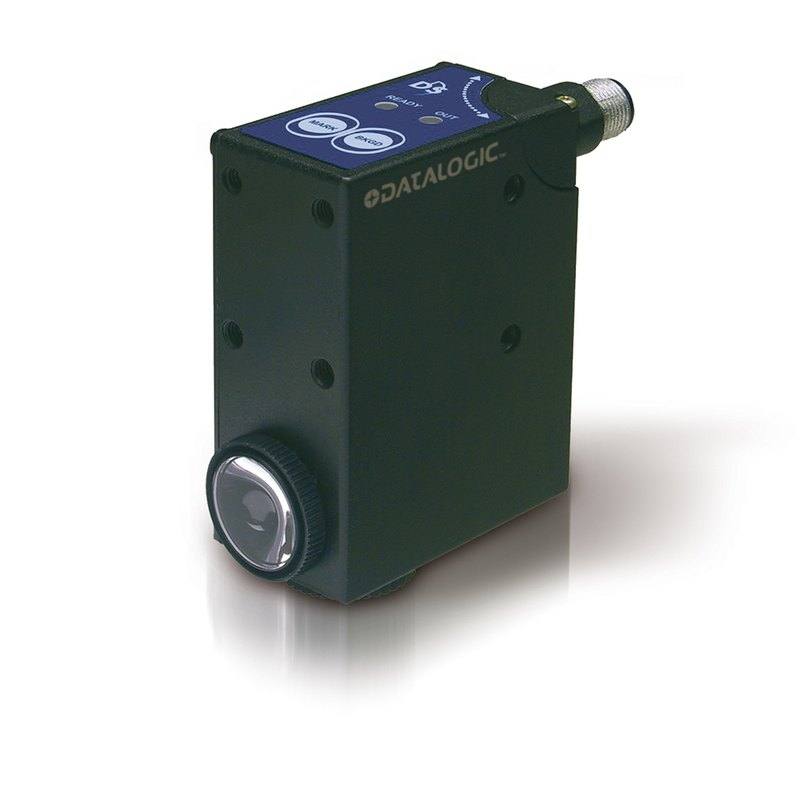
The TLµ-015 is a member of Datalogic/Datasensing's TLµ µ-series contrast sensors designed to detect register marks and neutral or coloured references. It uses red (630 nm) / green (526 nm) LED emission with automatic colour selection and a 1.5 x 5 mm spot at a 9 mm nominal sensing distance, set via two teach-in push-buttons or remote teach. Built in a Zamak metal housing with orientable optics, glass lens and IP67 protection, it delivers a 50 µs response time and 10 kHz switching frequency. Model 964401020 provides an NPN light/dark-selectable output over a 10–30 Vdc supply through an M12 4-pole connector.
The Datalogic/Datasensing TLµ-015 is a microprocessor-based contrast (register-mark) sensor, not an imaging device, so it solves a single well-defined task: detecting a printed mark or a contrast transition against a moving substrate and emitting a fast switching edge. Its sensing principle is diffuse reflection — it illuminates a fixed point with its own LED and reads the reflected intensity through a 9 mm glass lens, projecting a 1.5 x 5 mm vertical spot at a 9 mm nominal working distance. That elongated vertical spot is deliberate: it spans across the direction of web travel so the sensor reliably catches a register mark even with slight lateral wander, while staying narrow along the travel direction to keep the trigger edge crisp. Because the spot and the working distance are fixed by the 9 mm lens, this is a mark-reading sensor you mount at a set gap from the web, not a variable-range distance or measurement device.
The dual-colour emission is the core of how it discriminates marks. The sensor emits both red (630 nm) and green (526 nm) LED light and selects the wavelength automatically during teach-in to maximise the contrast between the mark and its background — the colour that gives the largest reflected-intensity difference wins. This is what lets it pick up coloured register marks and neutral references that a single-wavelength sensor would miss. Setup is done with two on-device teach-in push-buttons or a remote teach line, so an installer shows the sensor the mark and the background and the microprocessor sets the threshold; there is no manual potentiometer trimming of the colour channel. The speed numbers — 50 µs maximum response time and a 10 kHz maximum switching frequency — mean it can resolve marks on a fast-running web and feed a registration or cut-control system without lagging the line.
Electrically and mechanically it is built to wire straight into a packaging or printing machine as a trigger. The reference model (964401020) provides a single NPN output that is light/dark switchable, so you choose whether the output activates on the mark or on the background, with a 10 kΩ pull-down on the line. It runs on a wide 10–30 Vdc supply with reverse-polarity protection and terminates in an M12 4-pole connector for quick field replacement. The housing is Zamak (die-cast metal) with orientable optics and a glass lens, rated IP67, and rated for -10 to +55 °C operation — robust enough for wash-down-adjacent packaging and print environments. At 31 x 58 x 82 mm it is a compact maxi-case footprint, and the orientable optics let you aim the spot onto the web without re-positioning the whole body.
Best for
Register-mark detection on printing presses and converting lines to synchronise cut-off, print registration or web positioning
Triggering bag-making, form-fill-seal and flow-wrap machines off a printed eye-mark on flexible packaging film
Detecting coloured or neutral reference marks where a single-wavelength sensor lacks contrast, using the automatic red/green selection
High-speed labelling and packaging lines where the 50 µs response and 10 kHz switching keep pace with fast web travel
Position and presence checks against a fixed 9 mm spot on a consistently flat substrate (label edge, printed band, pre-printed mark)
Selection notes
This is a fixed-distance mark reader, not a ranging sensor: the 9 mm lens fixes both the 1.5 x 5 mm spot and the 9 mm working distance, so the mechanical mounting gap to the web must be held at roughly 9 mm for reliable contrast.
Orient the 1.5 x 5 mm spot with its long (5 mm) axis across the web and the short axis along travel — this tolerates lateral web wander while keeping the switching edge sharp; the orientable optics are provided for exactly this alignment.
The output is NPN only on model 964401020, light/dark selectable with a 10 kΩ pull-down — confirm your controller input is compatible with a sinking NPN signal before specifying, and use the light/dark setting to define whether mark or background drives the edge.
Always teach the sensor on the actual mark-and-background pair from production stock; the microprocessor picks red 630 nm vs green 526 nm automatically based on that pair, and a mismatched teach target will pick the wrong colour and reduce margin.
Plan for the wide 10–30 Vdc supply over an M12 4-pole connection and the -10 to +55 °C / IP67 envelope; the Zamak metal body and glass lens suit packaging and print floors but the temperature ceiling of +55 °C should be checked near hot dryers or sealing stations.
1. Install the IMPACT Software Suite and connect the camera
Install the IMPACT Software Suite on your PC, which provides both the configuration/viewer tools and the SDK. For a GigE Vision model (E100, M or U series), connect it to a dedicated NIC and, for USB3 models, use a certified USB3 cable and port. Power the camera and confirm it enumerates.
2. Bring the camera online and verify the link
For GigE Vision, put the camera and the host NIC on the same subnet (a static IP on the camera matching the NIC range is the most reliable starting point); for USB3, confirm the device is recognized. Open the IMPACT viewer/device tool, discover the camera, and verify a stable connection before streaming. Enabling jumbo frames on the NIC helps GigE throughput.
3. Set exposure, gain and trigger, then grab a first image
In the IMPACT tools, start a live stream and adjust exposure and gain until the image is well-lit without saturation; set white balance on color models. Begin in free-run (continuous) mode to confirm imaging, then switch to hardware or software trigger as your application requires. Capture and save a reference image once the scene looks correct.
4. Build a vision tool or move to the SDK/API
Use the IMPACT point-and-click vision tools to assemble an inspection, or use the IMPACT SDK to access the camera and results programmatically and feed them into your HMI/PLC application. As these are GenICam/GenTL-compliant devices, you can alternatively drive them from any GenICam-compliant third-party vision library if your pipeline standardizes on one.
5. Route the stable feed to deep-learning inspection (optional)
Once you have a stable, repeatable image, the feed can be sent to a deep-learning inspection platform such as Rosepetal for defect detection or classification tasks that go beyond rule-based tooling. Keep lighting, optics and trigger timing fixed so the images reaching the model stay consistent.
Frequently asked questions
It is a contrast / colour-mark photoelectric sensor. It detects a register mark or a contrast transition by measuring diffusely reflected light from its own LED through a 9 mm lens, projecting a 1.5 x 5 mm vertical spot at a 9 mm nominal distance. It outputs a switching signal on the mark — it does not produce an image or measure distance.
It emits both red (630 nm) and green (526 nm) LED light and automatically selects the wavelength that gives the best contrast between the mark and its background during teach-in. This lets it detect coloured register marks and neutral references that a single-colour sensor might not resolve.
Yes. It has a maximum response time of 50 µs (0.05 ms) and a maximum switching frequency of 10 kHz, which lets it resolve marks on fast-running webs and drive registration or cut-control without lagging the line.
The reference model (964401020) provides a single NPN output that is light/dark selectable, with a 10 kΩ pull-down. It runs on a 10–30 Vdc supply with reverse-polarity protection and connects through an M12 4-pole connector.
Setup uses two on-device teach-in push-buttons or a remote teach line — you show it the mark and background and the microprocessor sets the threshold and colour. The housing is Zamak metal with a glass lens and orientable optics, rated IP67, with an operating range of -10 to +55 °C, suiting packaging and printing environments.