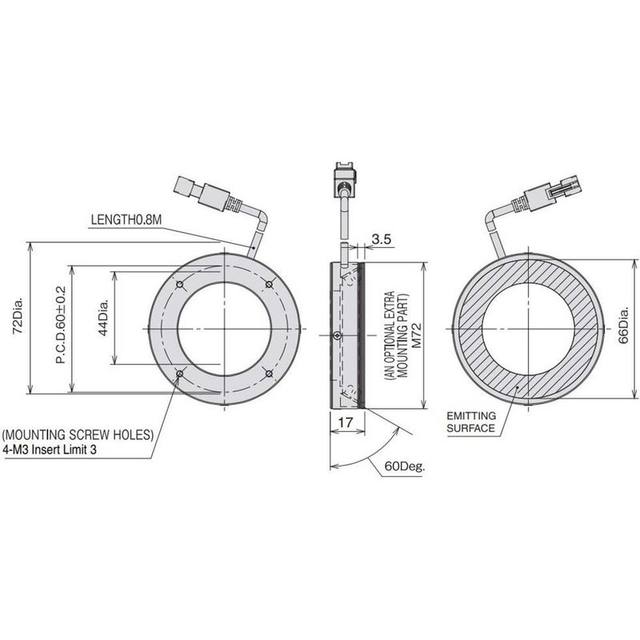
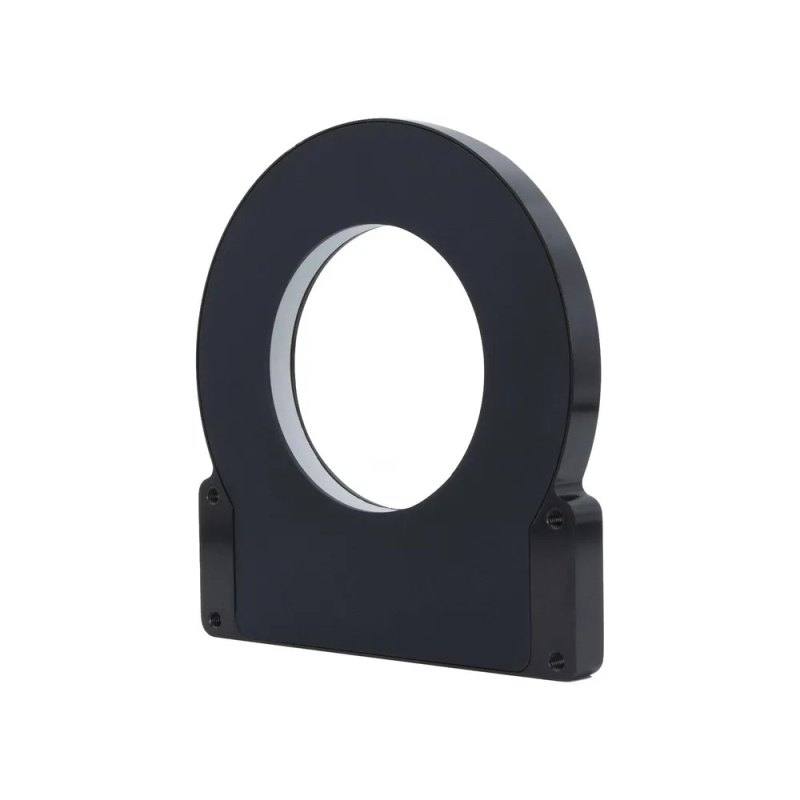
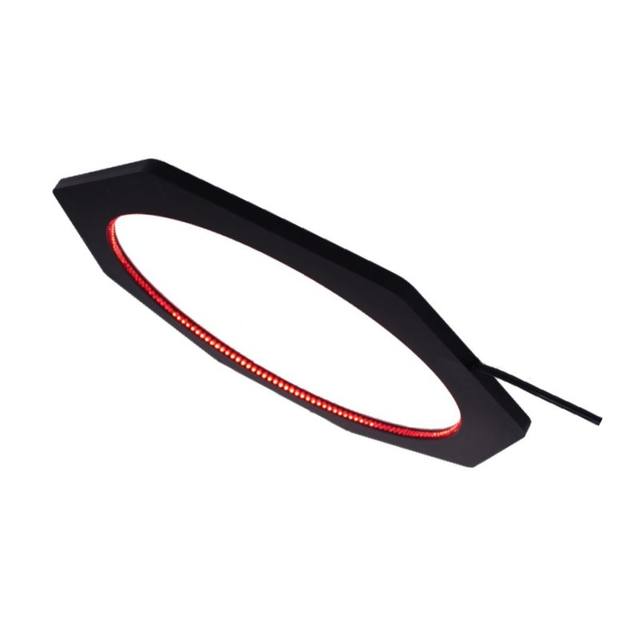
The Basler Standard Light Darkfield-50OD-x is a dark-field ring illuminator with a 50 mm luminous-area outer diameter and a recommended working distance of 1-30 mm, producing lateral flat-angle emission ideal for inspecting surfaces and edges. It is offered in four wavelength variants: White (5000 K), Red (625 nm), Blue (465 nm) and IR (850 nm). Powered from 24 VDC (+/-5%) at about 6 W, it supports continuous, current-controlled and strobe modes (down to a 100 us minimum flash time) and connects via a 4-pin M8 male connector. The black anodized aluminium housing with internal PMMA light guide measures 130 x 141 x 12 mm, weighs 360 g, is rated IP54 and operates from 10-30 C.
Brand
Basler
Lighting type
Dark field (horizontal ring light)
Color / wavelength
White / Red / Blue / IR (variant-dependent)
Available wavelengths
White (5000 K), Red (625 nm), Blue (465 nm), IR (850 nm)
Color temperature
5000 K (White variant)
Mode
Continuous, current-controlled and strobe (overdrive) modes
Working distance
1-30 mm (recommended)
Controller required
Optional (works with Basler Lighting Controller or standalone in continuous/triggered mode)
The Basler Standard Light Darkfield-50OD-x is a horizontal dark-field ring illuminator built around a 50 mm luminous-area outer diameter and a black anodized aluminium housing with an internal PMMA light guide. Unlike a conventional ring light that floods the scene from above, this unit emits laterally at very flat grazing angles, so light skims across the object surface. Smooth, flat areas reflect that grazing light away from the lens and stay dark, while any feature that breaks the plane, scratches, engraving, embossing, raised edges, dust, fibres or pin-sized defects, catches the light and appears bright against a dark background. That is the defining trick of dark-field geometry: it converts micro-topography into high local contrast that ordinary diffuse front lighting would wash out. The very short recommended working distance of 1-30 mm is intrinsic to this technique; the ring must sit close to and around the part so the flat-angle rays graze the surface rather than illuminating it head-on.
The light ships in four wavelength variants on the same mechanical platform, which lets you tune contrast to the material without redesigning the fixture: White (5000 K) for general-purpose, colour-tolerant inspection of mixed targets; Red (625 nm) as a common monochrome workhorse; Blue (465 nm), the shortest wavelength of the set, where you want crisper edges and finer scattering off small surface detail; and IR (850 nm) to suppress printed colour when surface texture matters more than print. Because the housing emits through a slight-diffuse light guide rather than a heavy diffuser, the output stays directional enough to keep the dark-field effect sharp, which is exactly what you want for revealing edges and surface flaws rather than evening out reflections.
Electrically the unit is straightforward to integrate: it runs from 24 VDC (+/-5%) at about 6 W and connects through a 4-pin M8 male connector. It supports continuous, current-controlled and strobe (overdrive) operation with a minimum flash time down to 100 us, so it can run as a steady lamp on a slow-moving or stationary part or be pulsed in sync with a camera trigger to freeze motion and run the LEDs above their continuous current for extra brightness during the exposure window. A controller such as the Basler Lighting Controller is optional: the light works standalone in continuous or simple triggered modes, but you add a controller when you need precise strobe timing and overdrive. Mechanically it is a thin 130 x 141 x 12 mm fixture weighing 360 g, rated IP54 for protection against dust and splashing water, and specified for a 10-30 C ambient (up to 45 C with adequate heat dissipation), all of which suit it to benchtop and in-line stations rather than washdown environments.
Best for
Surface defect inspection on flat or low-relief parts, scratches, dents, dust and pinhole flaws made visible by grazing dark-field illumination
Reading and verifying embossed, engraved, laser-marked or debossed characters and codes (OCR/OCV) where the marking has topography but little colour contrast
Edge detection and dimensional measurement of small components where flat-angle light produces a dark surface and bright, well-defined edges
AI-based defect inspection on electronics, semiconductor, metal, automotive and packaging parts that benefits from consistent high-contrast surface imaging
Close-proximity in-line or benchtop stations where a thin 12 mm-deep ring can be fitted around a small part at a 1-30 mm working distance
Selection notes
Working distance is short and non-negotiable: dark-field contrast only appears within the recommended 1-30 mm, so plan the mechanical layout so the 50 mm ring sits close around the part. It is unsuited to long stand-offs or large fields of view.
Pick the wavelength to the material and task: White (5000 K) for general/colour work, Red (625 nm) or Blue (465 nm) for monochrome contrast tuning (blue is the shortest wavelength here and scatters more off fine detail), and IR (850 nm) to suppress printed colour and emphasise texture. The four variants are mechanically identical, so the design-in is otherwise the same.
Decide early between standalone and controller operation. The light runs continuously or in simple triggered mode without a controller, but to use strobe/overdrive (down to a 100 us flash) and tight camera sync you should pair it with a controller such as the Basler Lighting Controller.
Confirm power and wiring: 24 VDC (+/-5%) at about 6 W through a 4-pin M8 male connector. Budget the supply and confirm your harness matches the M8 pinout before commissioning.
Check the environment against the IP54 rating and 10-30 C operating window (up to 45 C with heat dissipation). It tolerates dust and splashing water but is not a washdown-rated light, and ambient heat should be managed for stable output.
Specifications: General
Brand
Basler
Lighting type
Dark field (horizontal ring light)
Specifications: Interface
Connection
M8 connector, 4-pin male
Specifications: Optical
Color / wavelength
White / Red / Blue / IR (variant-dependent)
Available wavelengths
White (5000 K), Red (625 nm), Blue (465 nm), IR (850 nm)
Color temperature
5000 K (White variant)
Working distance
1-30 mm (recommended)
Emission angle
Lateral flat-angle (dark field) emission
Diffuser
No (slight-diffuse light guide)
Specifications: Electrical
Mode
Continuous, current-controlled and strobe (overdrive) modes
Controller required
Optional (works with Basler Lighting Controller or standalone in continuous/triggered mode)
Power consumption
6 W
Supply voltage
24 VDC (+/-5%)
Specifications: Environment
IP rating
IP54
Operating temperature
10 to 30 C (max 45 C with heat dissipation)
Specifications: Geometry
Illuminated area
Ø 50 mm luminous-area (outer diameter)
Specifications: Mechanical
Housing material
Black anodized aluminium with internal PMMA light guide
Dimensions
130 x 141 x 12 mm (H x W x D)
Weight
360 g
Applications this camera is commonly selected for. Open one to see the full recommended hardware and approach.
Get a first image quickly with the pylon Viewer, then move into the pylon SDK for your application. These cameras are GenICam/GenTL-compliant, so any compliant vision software can drive them as well.
Download and install the pylon Camera Software Suite for your OS from Basler. This provides the pylon Viewer, the GenTL transport-layer producers and the pylon SDK (C/C++/.NET/Python). On Windows the installer adds the needed drivers; on Linux follow the included setup notes for USB and network permissions.
2. Connect the camera and check the link
Cable the camera to its matching interface: GigE Vision to a GigE port (use a quality cable and, ideally, a dedicated NIC with jumbo frames enabled), USB3 Vision to a USB 3.x port with the supplied cable, or CoaXPress to the frame grabber. Provide power where required (PoE, USB bus power, or PoCXP). Open the pylon Viewer and confirm the camera appears in the device list; for GigE, make sure the camera and NIC are on the same subnet.
3. Grab a first image and set exposure, gain and pixel format
Select the camera in the pylon Viewer and start a continuous grab. Adjust exposure time and gain until the image is well exposed (avoid clipped highlights), set the pixel format (e.g. Mono8 or a Bayer/RGB format), and focus the lens. Use a test pattern if the lens or scene is not ready yet.
4. Configure triggering and acquisition
Decide between free-run and triggered acquisition. For synchronized capture, set the trigger source (software or a hardware line on the I/O connector), trigger mode and any debounce or exposure mode, then verify timing. Note the parameter names you change in the Viewer feature tree, as you will reuse them in code.
5. Move to the SDK or a GenICam-compliant library
Recreate your settings in code with the pylon SDK (C, C++, .NET or Python) to open the device, apply the same features and pull frames into your pipeline; pylon vTools and pylon AI can add processing blocks. Because the cameras are GenICam/GenTL standard, third-party vision libraries work too. Once the image stream is stable, you can route frames to a deep-learning inspection such as Rosepetal for automated defect detection.
Frequently asked questions
This light emits laterally at flat grazing angles instead of straight down, so smooth flat surfaces reflect the light away and stay dark, while edges, scratches, embossing, dust and raised defects catch the light and appear bright. It converts surface topography into high contrast, which is ideal for surface defect inspection, edge detection and reading embossed or engraved marks.
The recommended working distance is 1-30 mm. Dark-field contrast depends on light grazing the surface at a flat angle, so the 50 mm ring must sit close to and around the part. It is a short-range, close-proximity illuminator, not a long stand-off light.
It comes in four variants on the same housing: White (5000 K) for general and colour-tolerant work, Red (625 nm) and Blue (465 nm) for tuning monochrome contrast (blue is the shortest wavelength here and scatters more off fine detail), and IR (850 nm) to suppress printed colour and emphasise surface texture. Choose based on your material and whether print or topography matters most.
No, a controller is optional. The light runs standalone in continuous or simple triggered mode. You add a controller, such as the Basler Lighting Controller, when you need strobe/overdrive operation with a minimum flash time down to 100 us and precise synchronisation with the camera trigger.
It is powered from 24 VDC (+/-5%) and consumes about 6 W. It connects through a 4-pin M8 male connector and supports continuous, current-controlled and strobe modes.
It is rated IP54, so it withstands dust and splashing water, but it is not a washdown-rated light. It is specified for a 10-30 C ambient (up to 45 C with adequate heat dissipation), making it best suited to benchtop and standard in-line stations.