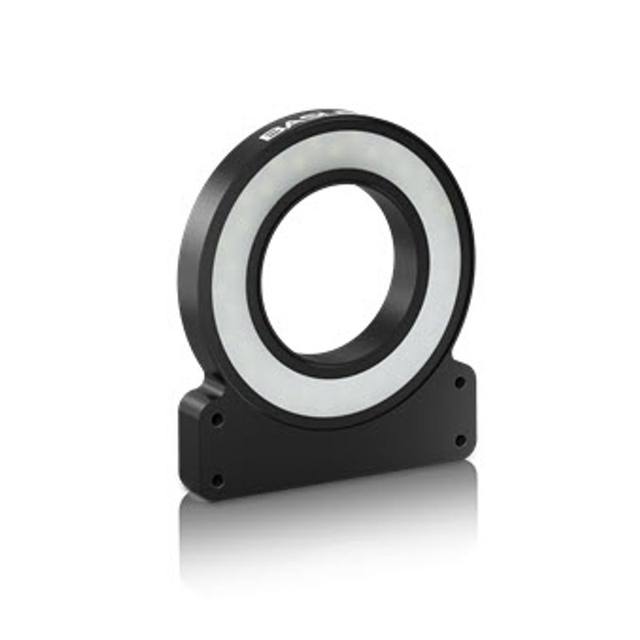
The FLV-DB10181W is a member of Omron's FLV-DB direct back light family using a high-density white-LED array to produce a 101 mm x 81 mm uniform illuminated area in a square housing measuring 73 x 73 mm. It consumes 8.1 W and weighs approximately 200 g. The FLV lighting connects directly to Omron FH/FZ (Xpectia) vision controllers or dedicated FLV-TCC/FLV-ATC/3Z4S-LT IDGB strobe controllers, so a controller is required to drive the unit. It is intended for backlit outline applications such as dimensional measurement of machine parts, shape detection of electronic components and ICs, and dirt detection on films.
Brand
Omron / Sentech
Lighting type
Direct back light (backlight)
Color / wavelength
White LED
Controller required
Yes - driven by Omron vision controller or FLV-TCC/FLV-ATC/3Z4S-LT IDGB strobe controller
The FLV-DB10181W is a direct back light, meaning its job is not to illuminate the surface of a part but to sit behind it and turn the part into a high-contrast silhouette. A high-density white-LED array fills a 73 x 73 mm uniform emitting window with even, diffuse light directed straight toward the camera. When an object is placed between this panel and the lens, the camera sees a dark outline against a bright, near-uniform field. That geometry is what makes back lighting the standard choice for edge-based measurement and shape work: edges become crisp transitions from saturated white to black, so subpixel edge detection, dimensional gauging, presence/absence and outline matching all become far more repeatable than they would be under front lighting, where surface texture, color and glare interfere. Because the part is read as an outline, surface finish and color are largely irrelevant, which is exactly the property you want for gauging machined parts or checking the body shape and lead pattern of ICs and electronic components.
The light source here is broadband white LED rather than a single narrow wavelength. For silhouette work that is the practical default: contrast at the edge comes from the part blocking light, not from a color interaction, so a white panel keeps the system flexible across monochrome and color cameras and across mixed part colors without committing you to a specific filter. If you later need to suppress ambient light or tighten edge contrast, the trade-off is that a white source gives you less room to band-pass filter than a monochromatic (for example red or blue) back light would; with white you rely more on the panel's own brightness and on shrouding stray light. The unit is compact and light, roughly 200 g in a slim, low-profile housing only about 17 mm thick, which lets it tuck into tight fixtures and conveyor gaps directly beneath the inspection point. At 8.1 W it is a modest electrical load, but it cannot be powered as a bare panel: this is a controller-driven light.
The FLV-DB10181W is part of Omron's FLV-DB family and is designed to connect directly to Omron FH/FZ (Xpectia) vision controllers or to dedicated FLV-TCC, FLV-ATC or 3Z4S-LT IDGB strobe controllers, so a controller is a required part of the system, not an optional accessory. Driving the light through one of these controllers is what lets you synchronize emission with image capture, hold a stable intensity, and run the panel in strobe mode timed to the camera exposure rather than burning it continuously. Practically, you mount the back light opposite the camera with the part passing through the gap between them, set the working distance so the part comfortably fits inside the illuminated field with margin around its edges, and wire the controller's strobe output to the camera trigger so each frame is exposed against a fully lit panel. Because it is an emitter rather than a sealed wash-down fixture, treat it as a standard machine-vision component for clean, indoor automation cells and protect it from direct fluid contact.
Best for
Dimensional measurement and gauging of machined parts on a bench or in-line, where the silhouette gives crisp, repeatable edges for subpixel width, length and diameter checks
Shape and outline detection of electronic components and ICs, verifying body geometry and lead patterns against a known profile in electronics assembly
Presence, orientation and outline verification of small molded or stamped parts moving through a tight conveyor gap, using the slim 17 mm-thick panel beneath the inspection point
Dirt and defect detection on transparent or translucent films, where contamination and pinholes show up as dark spots against the uniform backlit field
Packaging-line silhouette checks such as cap or component presence and shape consistency where part color and surface finish should not affect the result
Selection notes
Size the field to the part: the emitting area is 73 x 73 mm, so the largest object you can silhouette must fit inside that window with edge margin to spare; parts approaching or exceeding that footprint need a larger FLV-DB panel instead
Plan for a controller from the start - this light must be driven by an Omron FH/FZ (Xpectia) vision controller or an FLV-TCC, FLV-ATC or 3Z4S-LT IDGB strobe controller, so budget the controller and a strobe output wired to the camera trigger as part of the design, not as an add-on
Mount opposite the camera with the part in the gap, and choose the lens working distance and field of view so the part sits well within the lit area; back lighting is forgiving of surface but unforgiving of an object that overruns the panel edge
White LED keeps you flexible across mono and color cameras and mixed part colors, but it offers little to band-pass filter against ambient; if you need aggressive ambient rejection on the edge, consider a monochromatic back light plus a matching optical filter
It is a compact emitter (about 200 g, ~17 mm thick, 8.1 W), suited to clean indoor automation cells - shroud it from stray light for best edge contrast and keep it away from direct fluid or wash-down exposure
Specifications: General
Brand
Omron / Sentech
Lighting type
Direct back light (backlight)
Specifications: Optical
Color / wavelength
White LED
Specifications: Electrical
Controller required
Yes - driven by Omron vision controller or FLV-TCC/FLV-ATC/3Z4S-LT IDGB strobe controller
Power consumption
8.1 W
Specifications: Geometry
Illuminated area
73 x 73 mm
Specifications: Mechanical
Dimensions
101 x 81 x 17 mm
Weight
200 g
Applications this camera is commonly selected for. Open one to see the full recommended hardware and approach.
These steps take an Omron Sentech (STC) camera from the box to a stable first image and on to your own application. They apply across the GigE Vision, USB3 Vision and CoaXPress STC families; the interface only changes how you cable and power the camera.
Download and install the Sentech SDK on the host PC. The package provides StViewer, the viewing and configuration software you use to bring the camera up, and StApi, the programming SDK you integrate later. Because the cameras are GenICam/GenTL-compliant, StApi also registers a GenTL producer, so any GenICam-compliant third-party vision software can discover and drive the camera as an alternative front end.
2. Cable, power and connect the camera
Connect according to the interface. GigE Vision: link to a Gigabit NIC (use PoE or the separate power input) and put the camera and host on the same subnet; for USB3 Vision use a USB 3.x port and a certified cable; for CoaXPress (STC) connect to a CoaXPress frame grabber, which also supplies Power-over-Coax. Then open StViewer and let it enumerate the camera. If a GigE camera does not appear, check the IP configuration and firewall, and on USB3 confirm the host bandwidth and driver.
3. Configure exposure, gain and white balance
Open the device in StViewer and start a live stream. Set exposure and gain for a well-exposed, low-noise image: raise exposure first and only add gain when more light or a faster shutter is not an option, keeping exposure short enough to freeze motion on global-shutter models. On colour cameras, run white balance under your actual production lighting. Adjust the lens aperture and focus on a representative target before tuning anything else.
4. Set the trigger and grab a first image
Start in free-run (continuous) acquisition to confirm a clean, stable image. For inline inspection switch to hardware or software triggering: select the trigger source, set the active edge and any delay, and wire the strobe or illumination to the camera's I/O so lighting fires with each exposure. Acquire and save a frame in StViewer; this saved image is your reference for the SDK stage and for downstream inspection.
5. Move to the StApi SDK (or any GenICam software)
Once the image is stable, reproduce the same settings in code. Use StApi to open the device, apply the GenICam features you validated in StViewer (exposure, gain, trigger, pixel format) and grab frames into your application via the bundled C++, C, C#/.NET or Python interfaces; the included samples are the fastest starting point. Prefer a different stack? The same GenICam/GenTL camera works with third-party vision libraries. With a reliable feed, you can route it into a deep-learning inspection such as Rosepetal for AI-based defect detection.
Frequently asked questions
Yes. The FLV-DB10181W is controller-driven and cannot be powered as a bare panel. It connects directly to Omron FH/FZ (Xpectia) vision controllers or to dedicated FLV-TCC, FLV-ATC or 3Z4S-LT IDGB strobe controllers, which also let you synchronize and strobe the light to the camera exposure.
It produces a 73 x 73 mm uniform illuminated emitting area, so the part you want to silhouette should fit inside that window with margin around its edges. Larger objects need a bigger panel from the FLV-DB family.
It is a direct back light that sits behind the part and shines toward the camera, turning the object into a high-contrast dark silhouette against a bright field. That makes it ideal for outline and edge-based work such as dimensional measurement of machined parts, shape detection of electronic components and ICs, and dirt detection on films.
It uses a white LED array. Because contrast comes from the part blocking light rather than from any color interaction, the silhouette is largely unaffected by the part's color or surface finish, which keeps the setup flexible across monochrome and color cameras.
Yes, when driven through a compatible Omron vision controller or one of the dedicated strobe controllers (FLV-TCC, FLV-ATC, 3Z4S-LT IDGB). Strobing through the controller lets you fire the panel in sync with each exposure rather than running it continuously, and you wire the strobe output to the camera trigger.