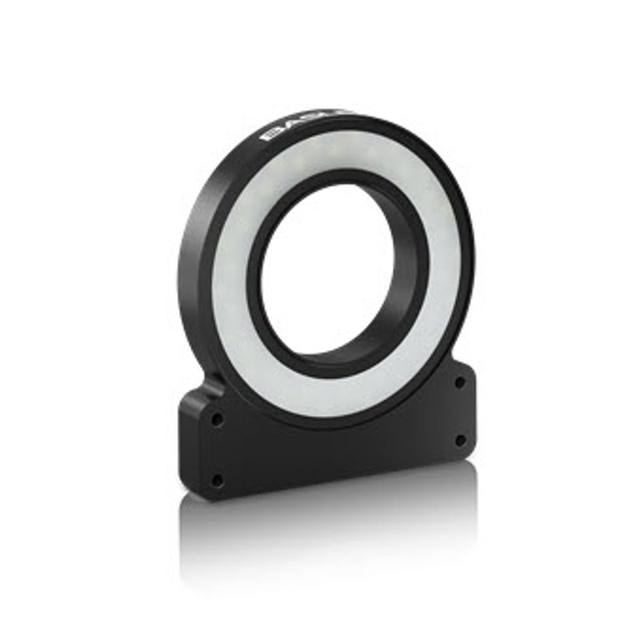
Omron / Sentech FLV-FR150 Shadowless Ring Light (150 mm)
FLV-FR150
The Omron FLV-FR150 is a diffused ("shadowless") ring light with a 150 mm outer diameter, 40 mm inner aperture and a 123 mm illuminated/emitting surface, in a low-profile 17.5 mm-thick housing. Special diffusion plates spread the light from the ring-arranged LEDs to give greater uniformity than a conventional ring light, reducing reflections and shadows on the target. It is offered in white (FLV-FR150W, 6.1 W), red (FLV-FR150R) and blue (FLV-FR150B) versions. Like the rest of the FLV series it is driven through Omron's FLV-TCC lighting controllers (24 VDC), which provide continuous and trigger/strobe operation.
Brand
Omron / Sentech
Lighting type
Ring (diffused / shadowless)
Color / wavelength
White (FLV-FR150W); also red and blue variants
Available wavelengths
White / Red / Blue (FLV-FR150W / R / B)
Diffuser
Yes - diffusion plate for shadowless, uniform illumination
The Omron FLV-FR150 is a diffused ring light, and the single most important word in its spec sheet is 'shadowless.' Where a bare ring of LEDs throws direct, angled light that creates hot spots and hard shadow edges, this fixture sits a diffusion plate over its ring-arranged LEDs so the emission becomes broadly diffuse rather than directional. The result is a 123 mm emitting surface that delivers highly uniform illumination across the field, suppressing the specular glints and shadow lines that confuse defect-detection and edge-finding algorithms. For an installer, that means it is the right tool when the target is reflective, curved, or textured and you need flat, even brightness instead of dramatic relief.
The geometry is what you design around. The fixture is 150 mm in outer diameter with a 40 mm inner aperture, so the camera and lens look straight through the center of the ring at the part below. The 17.5 mm housing thickness is genuinely low-profile, which matters when the light has to fit in a tight enclosure, under a robot arm, or close above a conveyor without forcing a long working distance. At 601 g it is a substantial fixture that wants proper bracket mounting rather than a flimsy clamp. It ships in white (FLV-FR150W, 6.1 W), red (FLV-FR150R), and blue (FLV-FR150B) variants; white is the general-purpose default for color and broadband inspection, while the red and blue options let you bias contrast or pair with optical filters when a monochrome task benefits from a single waveband.
This is a controller-driven light, not a plug-and-play LED. It runs on 24 VDC supplied through Omron's FLV-TCC series lighting controller over the connecting cable, and that controller is what unlocks both continuous and trigger/strobe operation. Continuous mode suits slow-moving or stationary inspection and simple setup; strobe mode lets you sync a bright pulse to the camera trigger to freeze motion on a moving line. Because the light is driven through the controller rather than carrying its own power supply, you must budget for the FLV-TCC in the bill of materials and wire the trigger from your camera or PLC into the controller rather than into the light itself.
Best for
Surface and defect inspection on reflective or curved parts where shadows and specular hot spots would otherwise generate false rejects
OCR/OCV reading of printed or engraved characters that need even, glare-free illumination across the whole field
2D code and traceability mark reading where uniform light improves decode reliability on shiny or textured substrates
Dimensional measurement and edge-finding tasks that depend on flat, consistent brightness rather than directional relief
Top-down inspection where the camera shoots through the 40 mm central aperture in a tight, low-clearance enclosure
Selection notes
Budget for the FLV-TCC controller: this light is driven through Omron's FLV-TCC series lighting controller on 24 VDC, so plan for the controller in your bill of materials rather than wiring the light to a bare supply.
Match the aperture to your optics: the 40 mm inner diameter sets the clearance for your lens; confirm your lens barrel and any filter ring fit through the opening before committing to a mounting distance.
Choose the color variant deliberately: white (FLV-FR150W, 6.1 W) is the broadband default, while the red (FLV-FR150R) and blue (FLV-FR150B) versions can sharpen contrast on specific materials or pair with matching bandpass filters for monochrome work.
Plan the mechanical mount for 601 g and a 150 mm footprint: the fixture is heavy and wide, so it needs a rigid bracket, and the 17.5 mm thickness lets you keep the standoff short in confined spaces.
Decide continuous vs strobe up front: continuous is simplest for static or slow inspection, but if the part moves you should wire the camera or PLC trigger into the FLV-TCC to strobe the light in sync and freeze motion.
Specifications: General
Brand
Omron / Sentech
Lighting type
Ring (diffused / shadowless)
Specifications: Interface
Connection
Cable to FLV-TCC controller
Specifications: Optical
Color / wavelength
White (FLV-FR150W); also red and blue variants
Available wavelengths
White / Red / Blue (FLV-FR150W / R / B)
Diffuser
Yes - diffusion plate for shadowless, uniform illumination
These steps take an Omron Sentech (STC) camera from the box to a stable first image and on to your own application. They apply across the GigE Vision, USB3 Vision and CoaXPress STC families; the interface only changes how you cable and power the camera.
Download and install the Sentech SDK on the host PC. The package provides StViewer, the viewing and configuration software you use to bring the camera up, and StApi, the programming SDK you integrate later. Because the cameras are GenICam/GenTL-compliant, StApi also registers a GenTL producer, so any GenICam-compliant third-party vision software can discover and drive the camera as an alternative front end.
2. Cable, power and connect the camera
Connect according to the interface. GigE Vision: link to a Gigabit NIC (use PoE or the separate power input) and put the camera and host on the same subnet; for USB3 Vision use a USB 3.x port and a certified cable; for CoaXPress (STC) connect to a CoaXPress frame grabber, which also supplies Power-over-Coax. Then open StViewer and let it enumerate the camera. If a GigE camera does not appear, check the IP configuration and firewall, and on USB3 confirm the host bandwidth and driver.
3. Configure exposure, gain and white balance
Open the device in StViewer and start a live stream. Set exposure and gain for a well-exposed, low-noise image: raise exposure first and only add gain when more light or a faster shutter is not an option, keeping exposure short enough to freeze motion on global-shutter models. On colour cameras, run white balance under your actual production lighting. Adjust the lens aperture and focus on a representative target before tuning anything else.
4. Set the trigger and grab a first image
Start in free-run (continuous) acquisition to confirm a clean, stable image. For inline inspection switch to hardware or software triggering: select the trigger source, set the active edge and any delay, and wire the strobe or illumination to the camera's I/O so lighting fires with each exposure. Acquire and save a frame in StViewer; this saved image is your reference for the SDK stage and for downstream inspection.
5. Move to the StApi SDK (or any GenICam software)
Once the image is stable, reproduce the same settings in code. Use StApi to open the device, apply the GenICam features you validated in StViewer (exposure, gain, trigger, pixel format) and grab frames into your application via the bundled C++, C, C#/.NET or Python interfaces; the included samples are the fastest starting point. Prefer a different stack? The same GenICam/GenTL camera works with third-party vision libraries. With a reliable feed, you can route it into a deep-learning inspection such as Rosepetal for AI-based defect detection.
Frequently asked questions
It uses a diffusion plate over the ring-arranged LEDs so the emission becomes diffuse rather than directional. That spreads the light across the 123 mm emitting surface for greater uniformity than a conventional ring light, reducing the reflections and shadows that fall on the target.
Yes. The FLV-FR150 is driven through Omron's FLV-TCC series lighting controller and runs on 24 VDC supplied through that controller via the connecting cable, so the controller is part of the required setup.
Yes. Through the FLV-TCC controller the light supports both continuous and trigger/strobe operation, so you can pulse it in sync with the camera trigger for moving-line inspection, or run it steady for static work.
Three: white (FLV-FR150W, 6.1 W), red (FLV-FR150R), and blue (FLV-FR150B). White is the broadband general-purpose choice; the red and blue variants target single-waveband contrast control.
The ring has a 40 mm inner aperture and the camera looks down through that opening at the part. The overall fixture is 150 mm in outer diameter and only 17.5 mm thick, so confirm your lens and any filter clear the 40 mm inner diameter.